
In this post
About 13 min read · 100% renter-friendly — no drills, no nails, no paint.
The 30-second version
- Every idea here is freestanding, over-door, tension, magnetic or removable-strip only — nothing is screwed in.
- Measure the 5 cabinet measurements before you buy anything.
- Do these 3 first, in order: the two-tier under-sink basket (idea 1), shelf risers (idea 4), then the slim rolling cart for the fridge gap (idea 13). Together they run about $55–100 and fix the three worst zones in most rental kitchens.
| Ideas | Drills needed | Typical cost | Start here | Printable |
|---|---|---|---|---|
| 23 | None | All 23: about $375–690 · Most renters need 5–8: about $90–200 | Ideas 1, 4 & 13 first (about $55–100 together) | Pre-Shopping Checklist (Printables & Checklists) |
If your kitchen is the size of a parking space, you already know the rules: no drills, no nails, no paint, and nothing that leaves a mark when you move out. Most storage advice ignores all of that — it assumes you can screw a rail into the wall wherever you like.
This list doesn’t. Every idea below is freestanding, over-door, tension-based, magnetic-on-appliance, or held with removable strips only. Nothing touches a wall with a screw, and everything comes with you on moving day.
Cabinets & under-sink
1. A two-tier under-sink basket that slides out
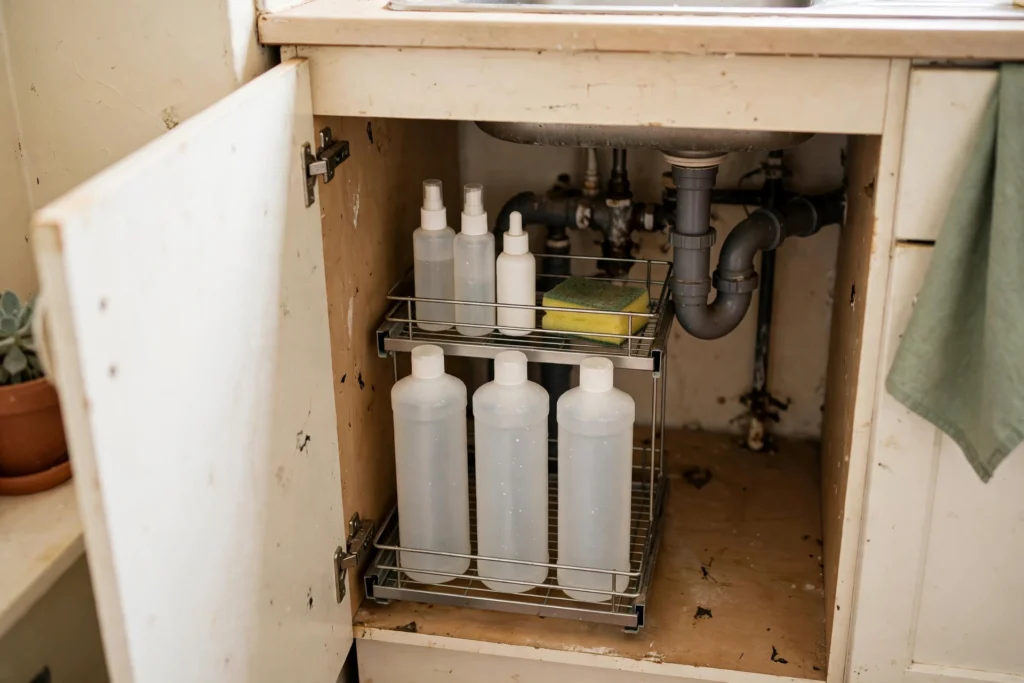
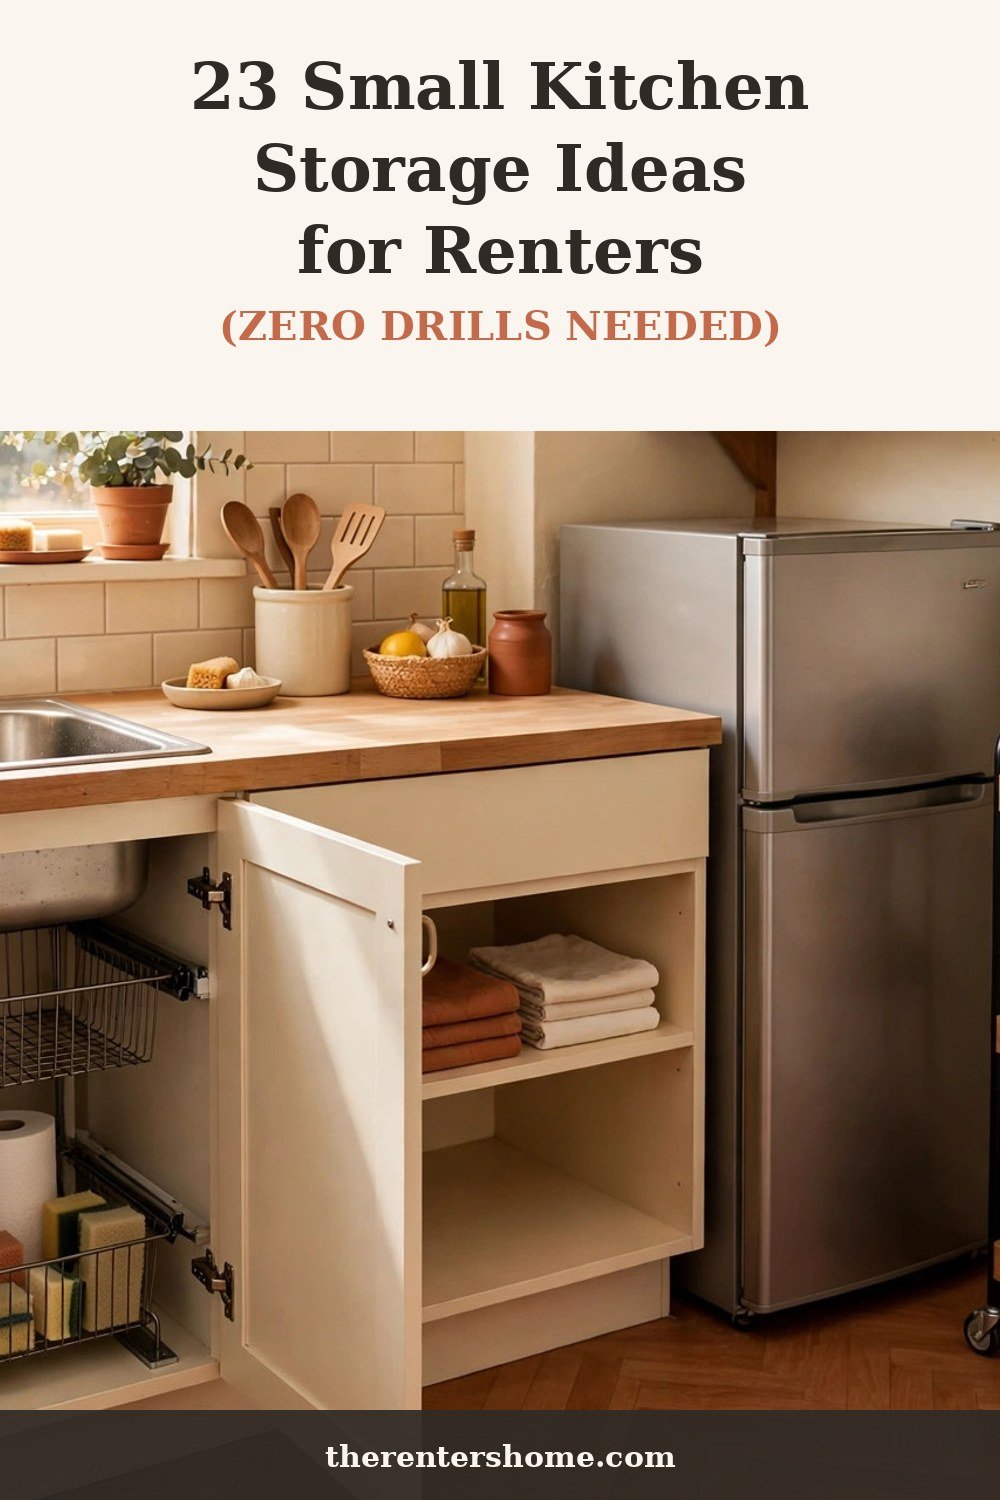
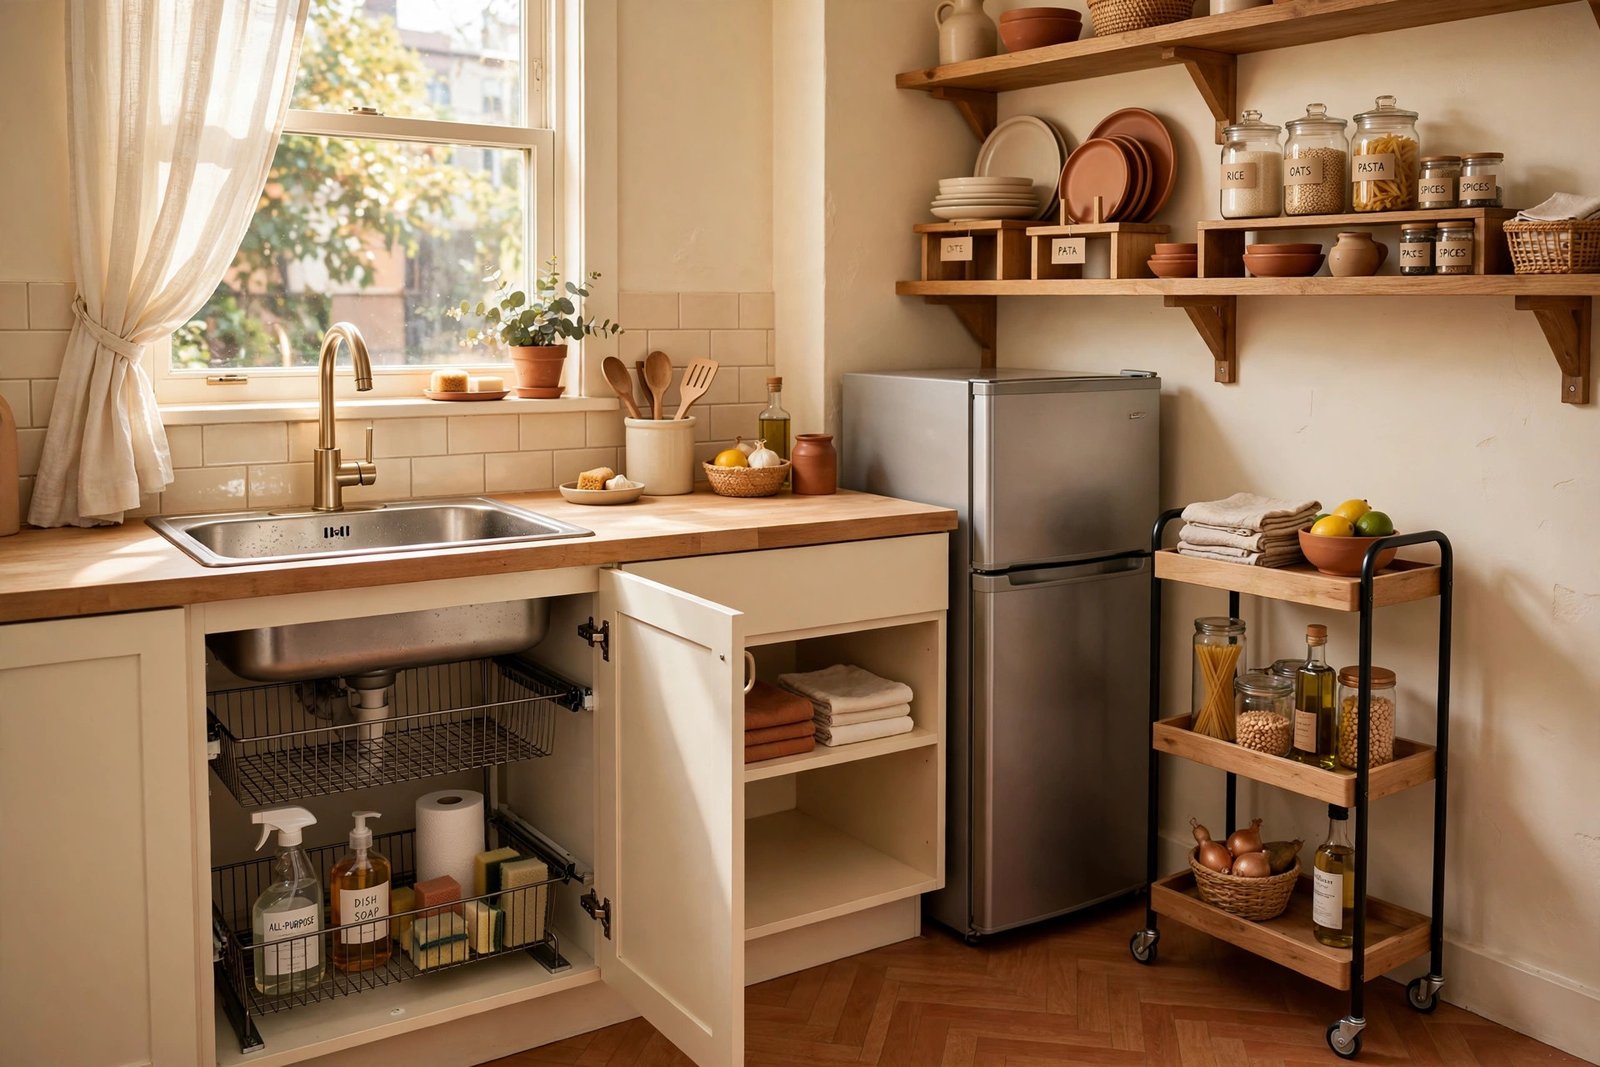
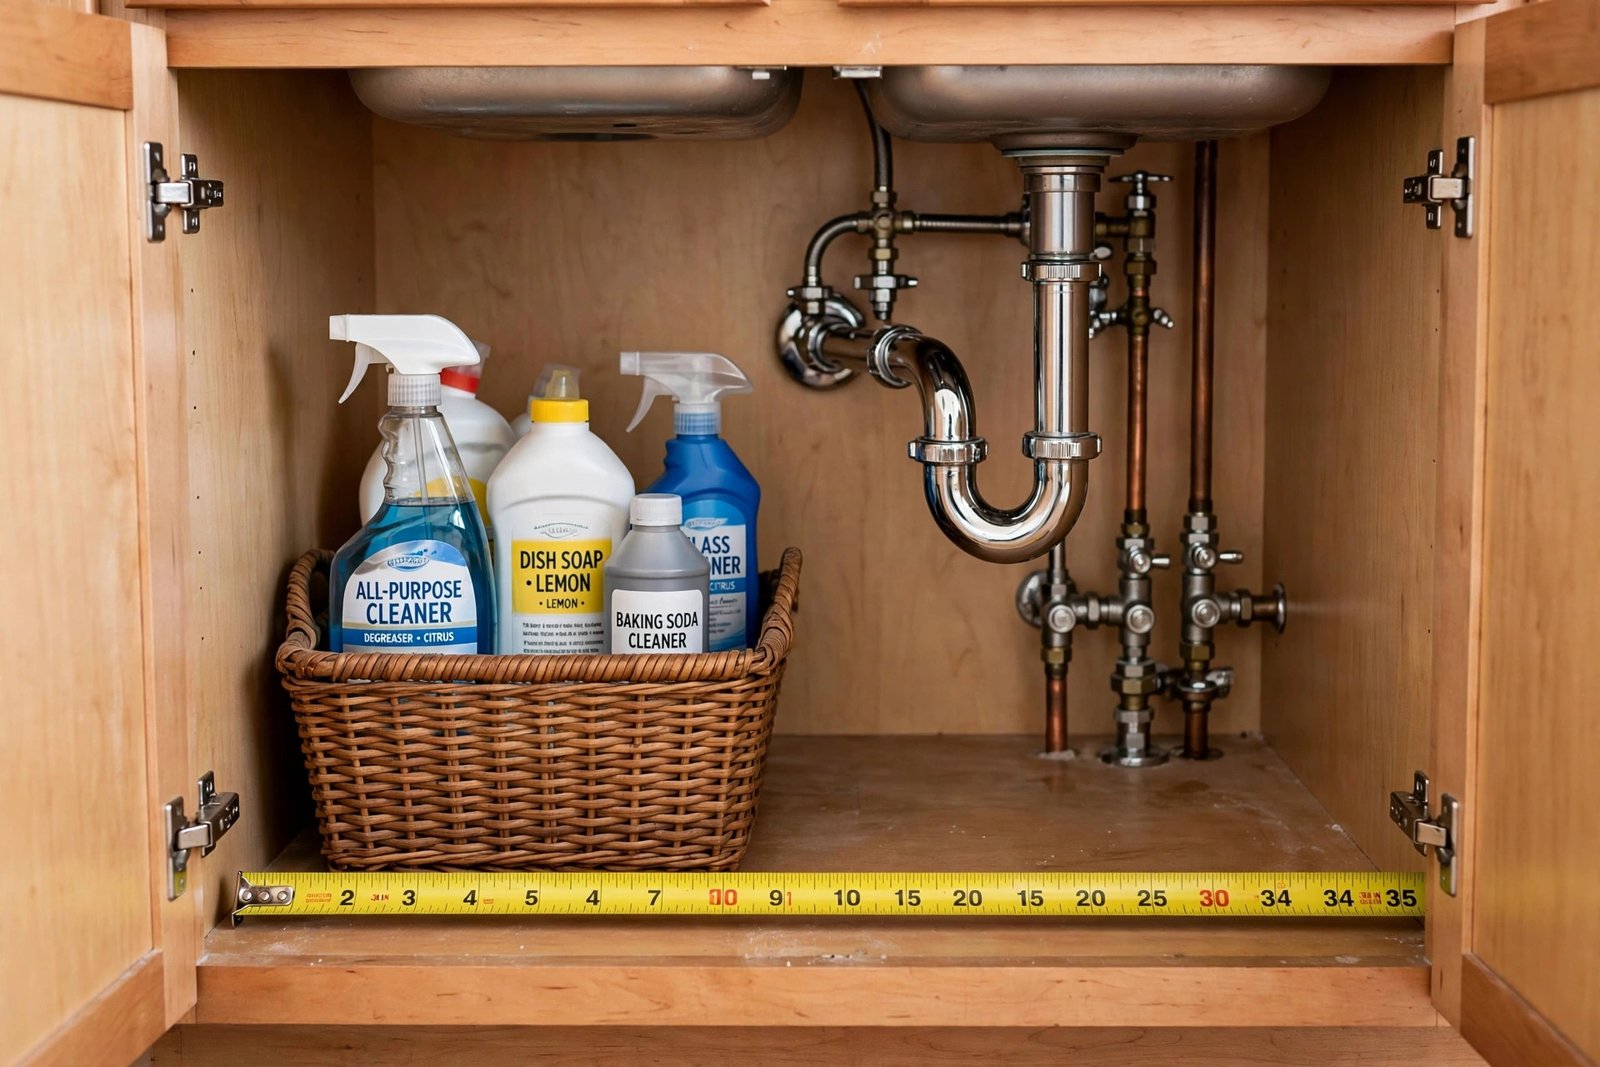
A two-level basket frame that sits on the cabinet floor and pulls toward you turns the under-sink cave into two shallow, reachable layers: tall bottles below, smaller items above. Check your usable height on the wider side of the pipes first — most frames need about 40 cm of clear height and 25 cm of width. Trade-off: the sliding frame costs more than a plain box, and the top tier only fits short bottles. If your pipe sits dead centre, a narrower single-column version fits better.
Cost: ~$20–35 • Best for: deep under-sink cabinets with tall bottles • Measure first: clear height ~40 cm and width ~25 cm on the wider side of the pipes • Watch out: Sliding frames cost more than a plain box, and the top tier only fits short bottles; if your pipe sits dead centre, pick a narrower single-column version.
2. An adjustable frame shelf that bridges the pipes
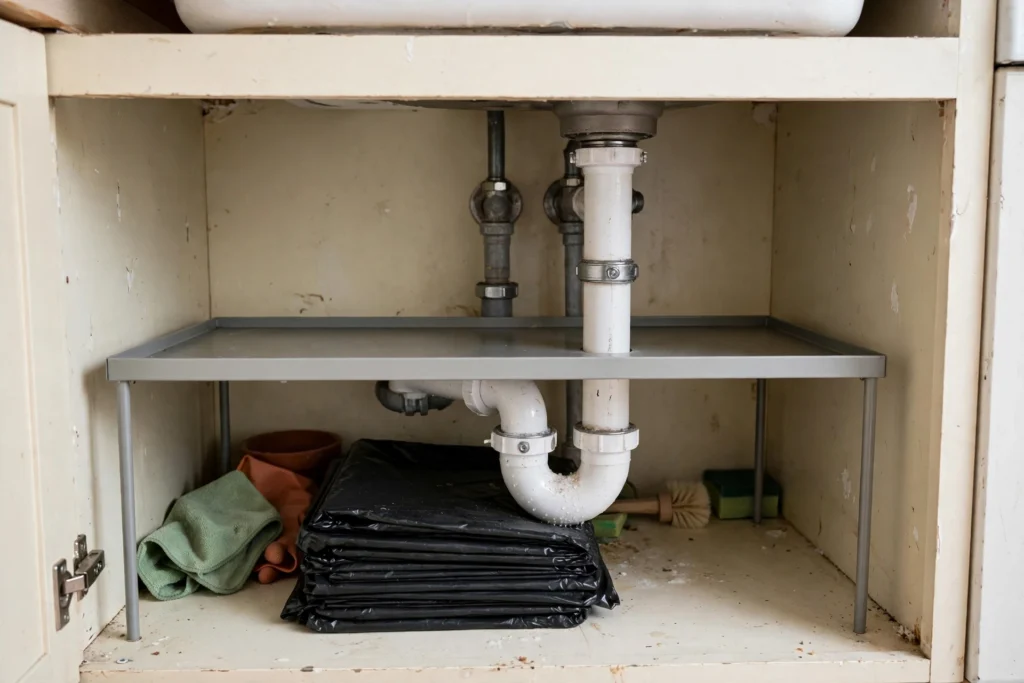
Instead of working around the plumbing, work over it: a flat shelf on four legs, with the legs positioned either side of the pipes, creates a level surface above the messy zone. Measure the height from the cabinet floor to the underside of the pipe bend, then pick a shelf height just below it. Look for adjustable legs — rental cabinets vary by centimetres, not by standard sizes. Trade-off: the space under the shelf is only good for flat, rarely used things like spare bin bags.
Cost: ~$15–30 • Best for: under-sink cabinets blocked by plumbing • Measure first: pipe positions and the clear height on both sides of the pipes • Watch out: The space under the shelf is only good for flat, rarely used things like spare bin bags.
3. A tension rod under the sink for spray bottles
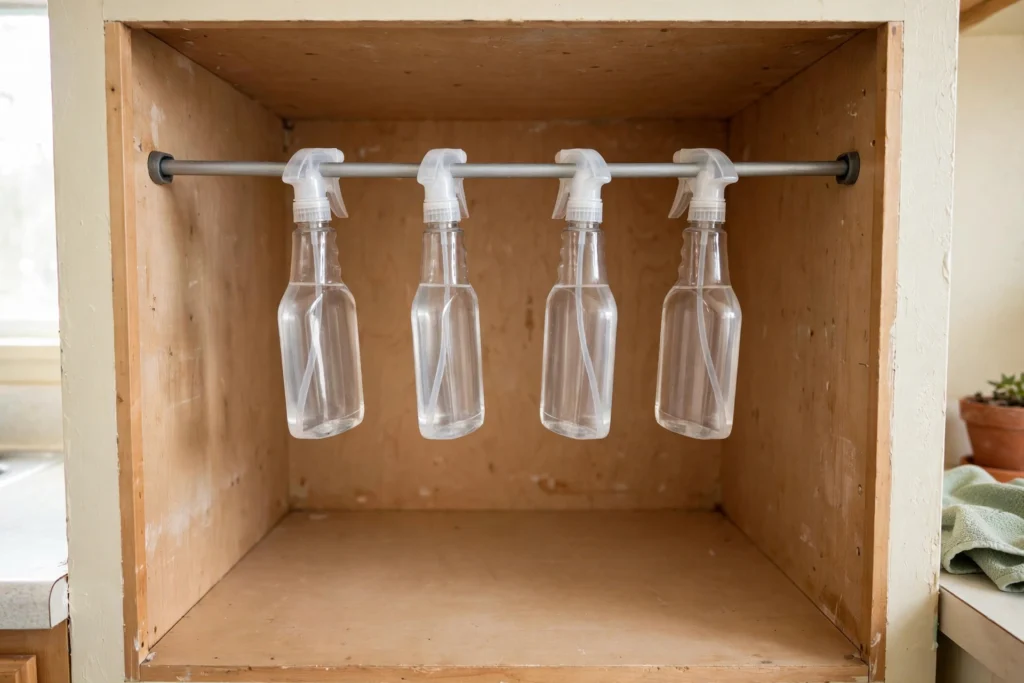
A short spring tension rod, wedged side to side high inside the under-sink cabinet, gives spray bottles somewhere to hang by their trigger necks — which frees the entire cabinet floor for bins and baskets. Match the rod to your cabinet’s inside width (most expand across a 10–15 cm range). It holds more than you’d expect because the bottles hang, not stack. Trade-off: very heavy bottles can bow a cheap rod, so keep the heaviest one on the floor.
Cost: ~$8–15 • Best for: spray bottles cluttering the under-sink floor • Measure first: the inside width of the cabinet, side to side • Watch out: Very heavy bottles can bow a cheap rod — keep the heaviest one on the floor.
4. Shelf risers inside your cabinets
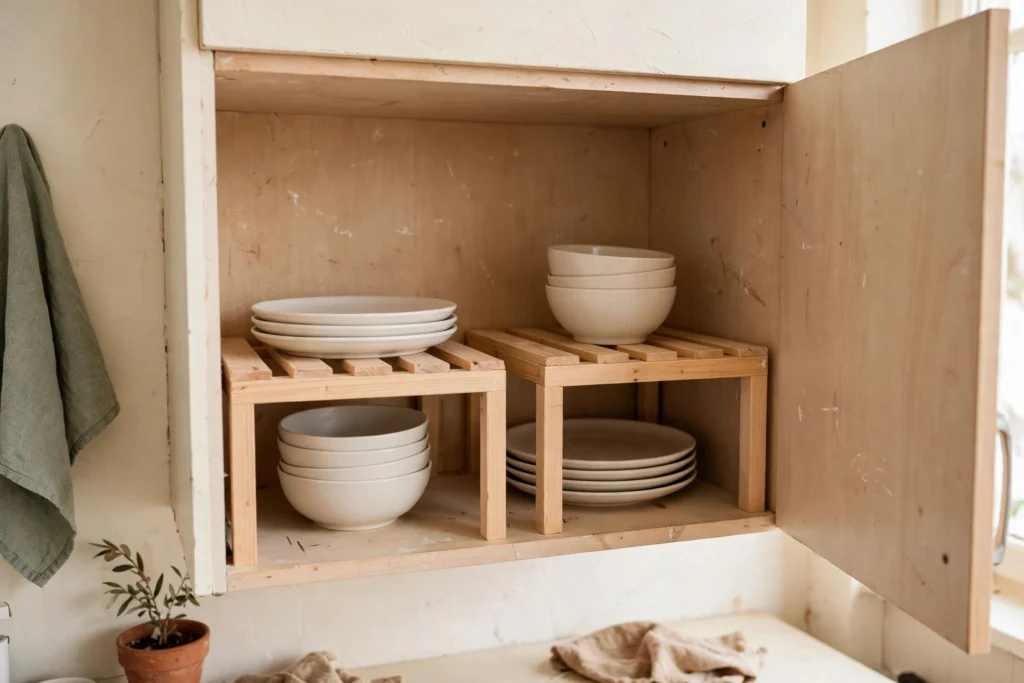
Most rental cabinets waste the top half of every shelf. A simple riser — a small raised platform that stands on the existing shelf — doubles the surface for plates, bowls or mugs in one move. Measure the shelf height and leave at least 12 cm above the riser for the tallest thing you own. Stackable risers in the same width look tidier than mixed sizes. Trade-off: risers suit light, everyday items; a full stack of stoneware belongs on the solid shelf below.
Cost: ~$10–20 • Best for: cabinets wasting the top half of every shelf • Measure first: shelf height and depth, leaving headroom above the riser • Watch out: Risers suit light, everyday items; a full stack of stoneware belongs on the solid shelf below.
5. A turntable for the deep-cabinet black hole
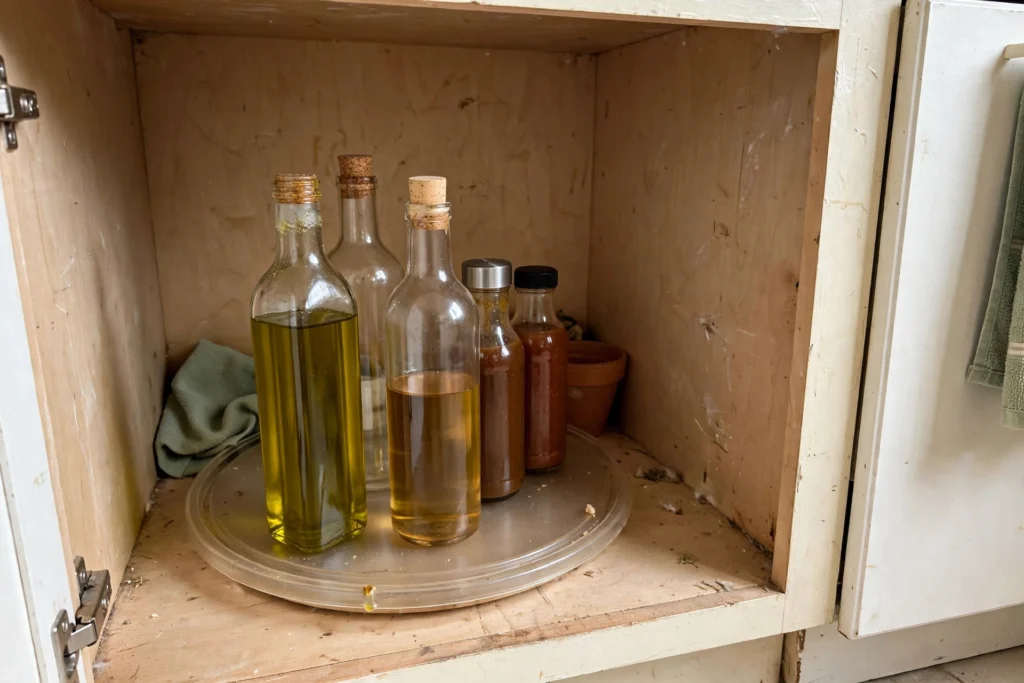
Every small kitchen has one cabinet where things go to be forgotten. A turntable (lazy Susan) with a raised lip turns that depth into a rotation: oils and sauces at the back come to the front with one spin. Measure the cabinet’s inside depth and door opening — the turntable must be smaller than both, or it will never get in. A 25–30 cm diameter suits most base cabinets. Trade-off: you lose the corners, so square bottles still belong on a shelf.
Cost: ~$10–18 • Best for: deep cabinets where things get forgotten at the back • Measure first: cabinet inside depth and door opening — the turntable (25–30 cm suits most base cabinets) must be smaller than both • Watch out: You lose the corners — square bottles still belong on a shelf.
Counters & walls — without drills
6. A freestanding tiered counter shelf
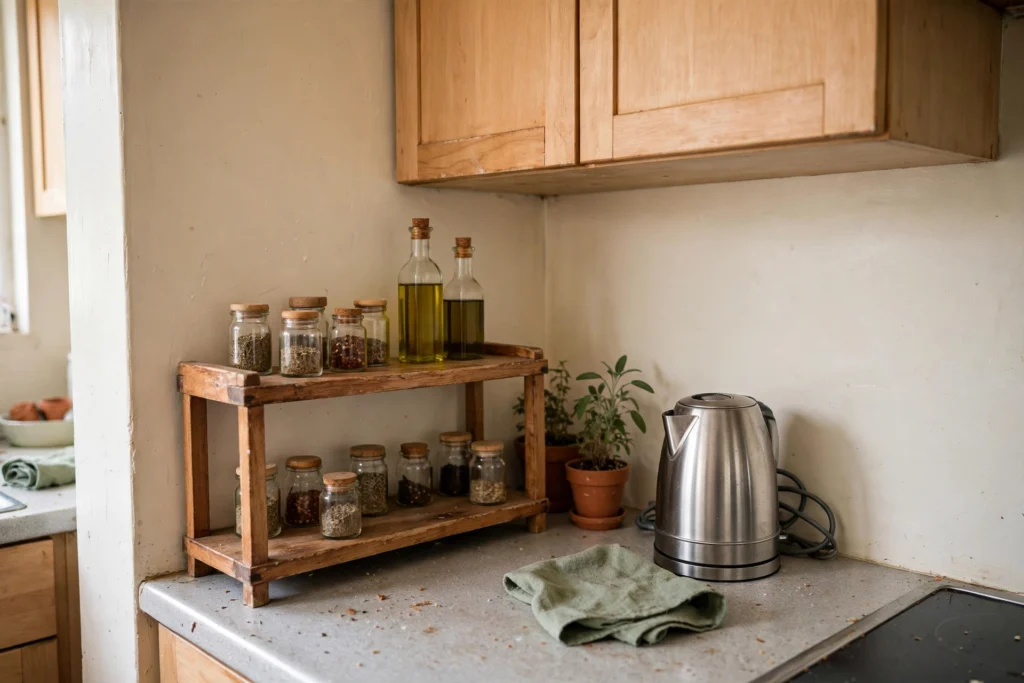
A two-tier shelf that simply stands on the counter moves spices, oils and the kettle’s clutter upward instead of outward. It works best in a corner, where it steals no prep space. Measure your counter depth (often just 55–60 cm in rentals) and the height to the wall cabinets above — the top tier needs about 20 cm of clear height to be useful. Trade-off: it makes the counter behind it harder to wipe, so keep it where crumbs don’t gather.
Cost: ~$20–40 • Best for: spices, oils and kettle clutter in a counter corner. • Measure first: counter depth (often 55–60 cm in rentals) and height to the wall cabinets — the top tier needs about 20 cm clear height. • Watch out: It makes the counter behind it harder to wipe — keep it where crumbs don’t gather.
7. A roll-up drying rack over the sink
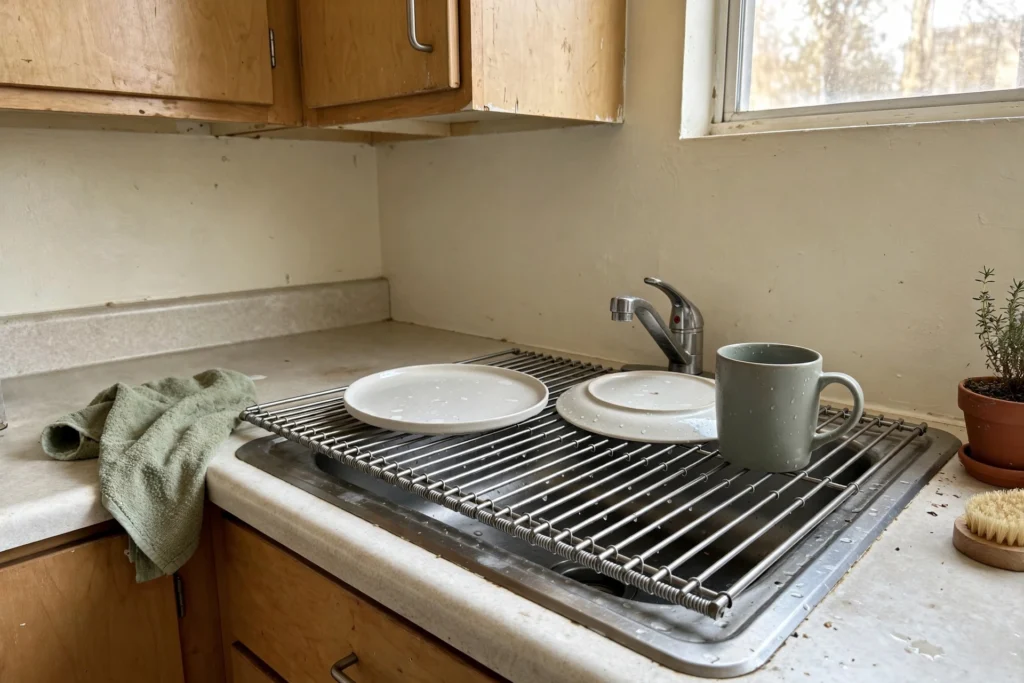
A roll-up rack of silicone-coated bars unrolls across the sink and holds washed dishes, fruit or a hot pan — then rolls away into a drawer when you need the sink back. Measure your sink’s width front-to-back plus a few centimetres of rest on each side. In a one-bowl rental sink, this is often the only “dish rack” that fits at all. Trade-off: it holds a modest load; a full dinner-party wash-up will still need a tea towel on the counter.
Cost: ~$15–25 • Best for: a one-bowl rental sink with no room for a dish rack. • Measure first: sink width front-to-back, plus a few centimetres of rest on each side. • Watch out: It holds a modest load; a full dinner-party wash-up still needs a tea towel on the counter.
8. A removable adhesive hook rail for utensils
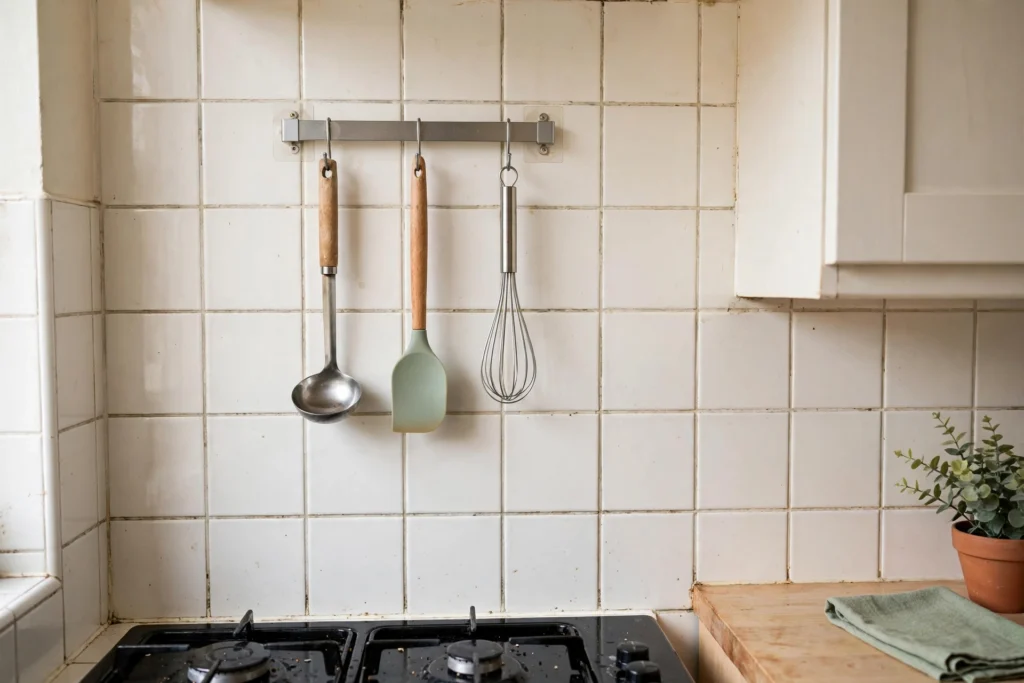
A short rail or row of hooks on the wall beside the hob keeps ladles and spatulas off the counter and out of the one precious drawer. Use removable strips only, rated for more weight than your heaviest utensil, and stick them to smooth tile or painted wall — never to wallpaper. Leave the strips’ pull-tabs accessible, or removal day gets difficult. Trade-off: adhesive hates steam, so keep the rail beside the hob, not directly above a kettle’s spout.
Cost: ~$10–20 • Best for: ladles and spatulas beside the hob, off the counter. • Measure first: no tape number — check the strips are rated above your heaviest utensil, the surface is smooth tile or painted wall (never wallpaper), and the pull-tabs stay accessible. • Watch out: Adhesive hates steam — keep it beside the hob, not above a kettle’s spout.
9. Magnetic spice jars on the fridge
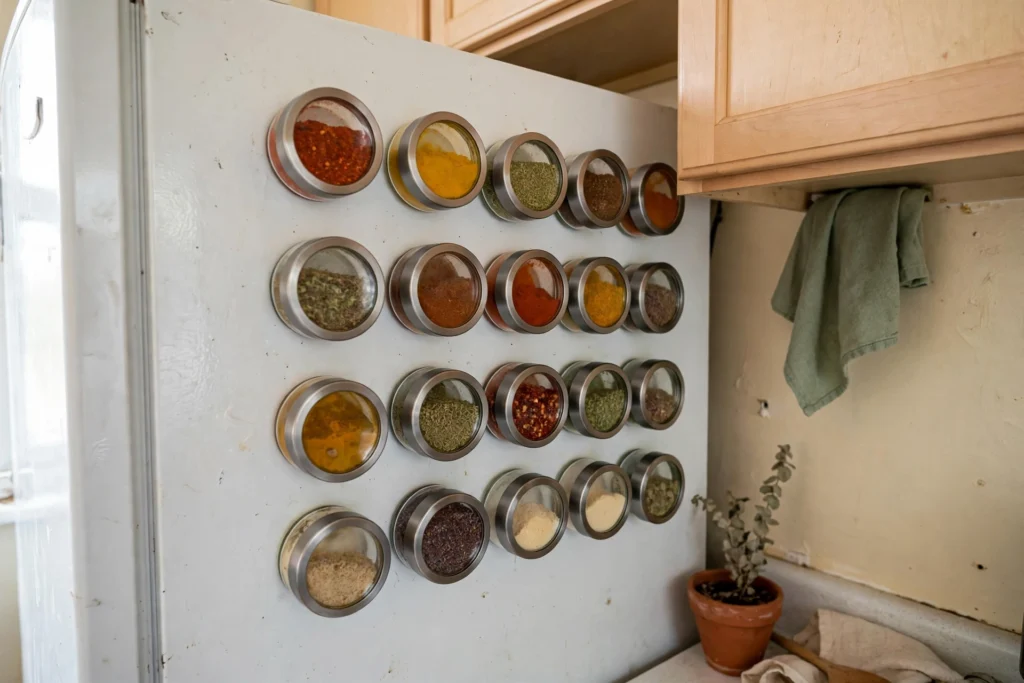
Small hexagonal or round spice jars with magnetic bases live on the side or front of the fridge, which frees an entire drawer or shelf. This is magnetic-on-appliance only — no fixings, no marks. Check how much flat fridge surface your kitchen layout actually exposes before buying a set of 24; many renters only have room for 12. Trade-off: spices fade faster in bright light, so the side of the fridge beats the front if your kitchen is sunny.
Cost: ~$20–35 • Best for: freeing a whole drawer or shelf; a set of 12 suits most renters, not 24. • Measure first: how much flat fridge surface your layout actually exposes. • Watch out: Spices fade faster in bright light — the fridge side beats the front in a sunny kitchen.
10. A mug tree instead of a mug shelf
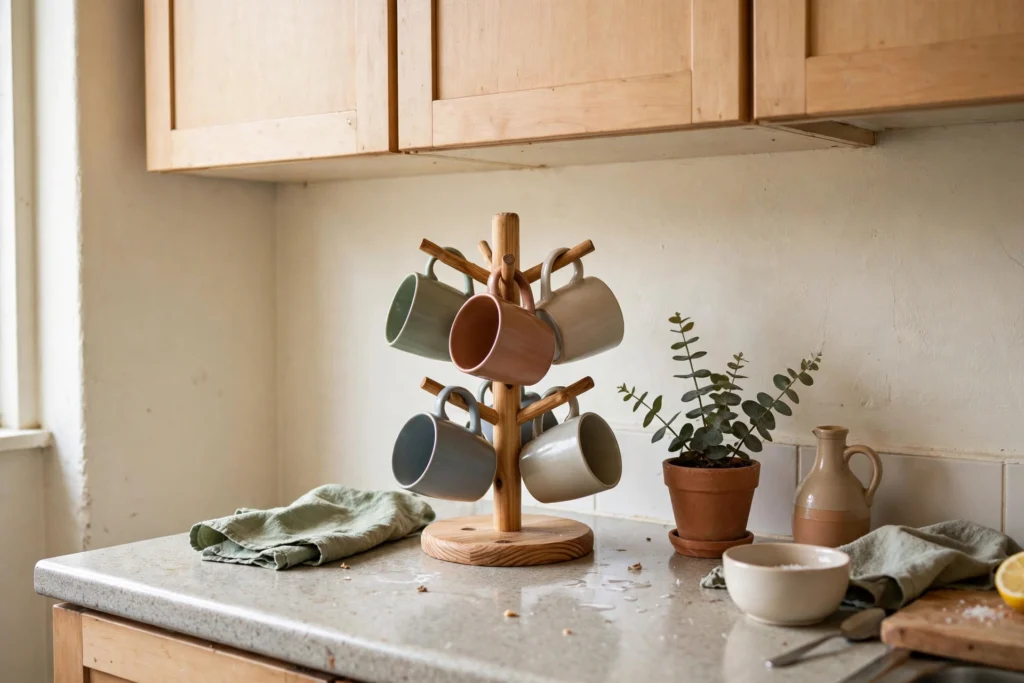
Mugs are bulky, don’t stack well, and quietly eat a whole cabinet shelf. A countertop mug tree holds six to eight in the footprint of one dinner plate. Measure the height under your wall cabinets — a standard tree needs about 35–40 cm, and tall travel mugs may not clear the arms. Trade-off: it’s one more thing on the counter, so it earns its place only if it empties half a cabinet shelf.
Cost: ~$12–25 • Best for: six to eight mugs in the footprint of one dinner plate. • Measure first: height under your wall cabinets — a standard tree needs about 35–40 cm. • Watch out: It’s one more thing on the counter — it earns its place only if it empties half a cabinet shelf.
One honest warning before the list: in a small rental kitchen, the wrong size is worse than no storage at all. So measure first — it takes ten minutes and saves every return trip.
Shopping for these? Measure first.
Five quick measurements decide whether an organiser fits or gets returned — tick them off before you spend a penny.
Before you buy anything, measure these five things
The five measurements that decide whether an organiser fits or gets returned:
- Door opening width — the clear width your cabinet door actually opens to, not the cabinet’s outside width.
- Pipe position from the left wall — how far the under-sink pipes sit from the left side of the cabinet, so baskets can work around them.
- Usable height on both sides of the pipes — the clear height left and right of the plumbing, measured separately; they are rarely equal.
- Cabinet depth, front to back — inside measurement, door closed, so nothing blocks the door from shutting.
- Whether a mat is fitted or sits in a basket — a fitted under-sink mat and a basket mat need different clearance underneath organisers.
Doors, sides & forgotten gaps
11. An over-cabinet-door organiser
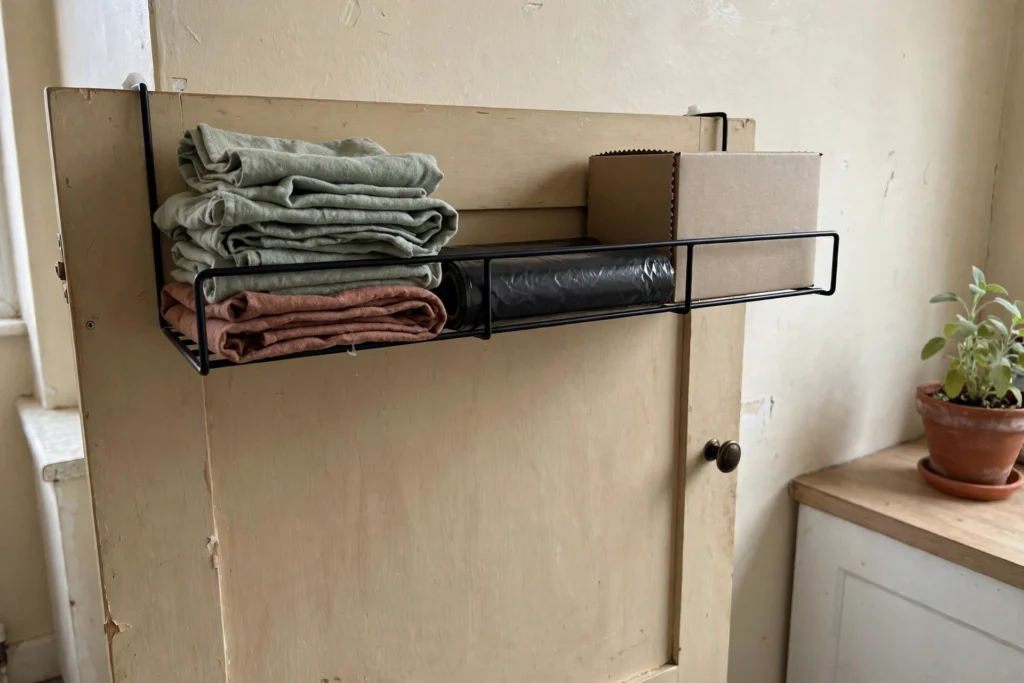
A slim rack that hooks over the top of a cabinet door — with a small towel rail or basket on the front — puts cleaning cloths, bin bags or cling film exactly where you reach for them. Check your door thickness (most hooks fit 2 cm doors) and the clearance above, so the hook doesn’t scrape the counter edge. Felt pads on the hooks protect the paint. Trade-off: it suits one cabinet door, not all of them — a row of them makes doors rattle and look cluttered.
Cost: ~$10–18 • Best for: cleaning cloths, bin bags or cling film on one cabinet door. • Measure first: door thickness (most hooks fit 2 cm doors) and the clearance above, so the hook doesn’t scrape the counter edge. • Watch out: One door only — a row of them makes doors rattle and look cluttered.
12. An over-door rack on the larder or hallway door
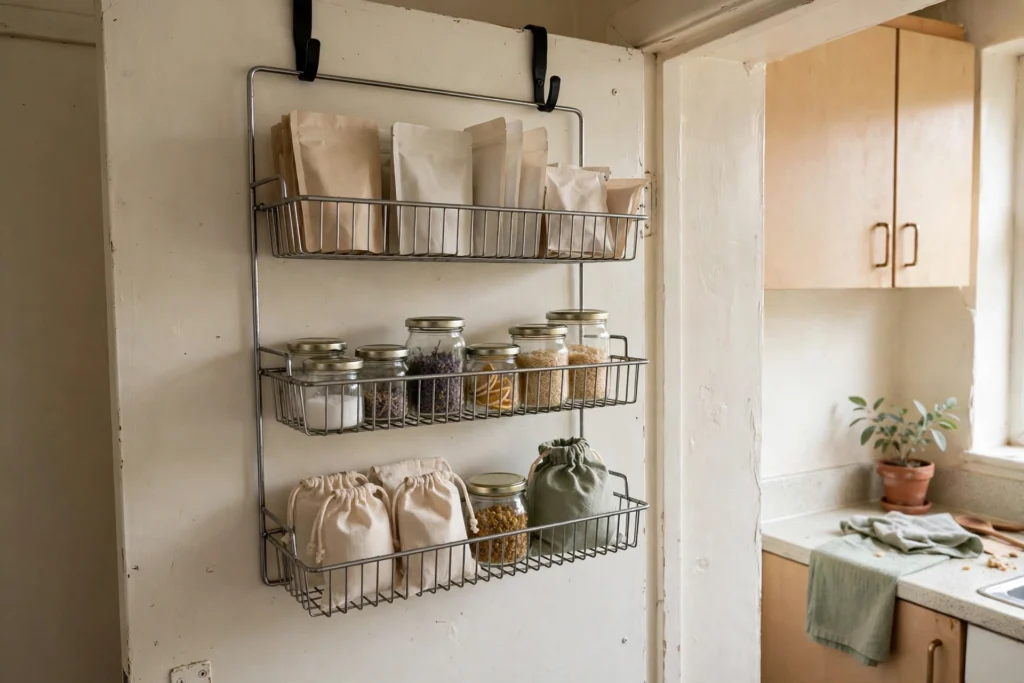
The back of a door is a full-height storage wall you already pay rent on. An over-door rack with shallow baskets holds packets, jars and cleaning supplies without touching a wall. Measure the gap between the door top and the frame — you need roughly 1 cm of clearance for the hooks as the door closes — and pad the frame where metal meets paint. Trade-off: heavy glass jars make the door swing oddly; keep doors for light, dry goods.
Cost: ~$20–35 • Best for: light, dry goods — packets and jars, never heavy glass. • Measure first: gap between door top and frame — roughly 1 cm clearance for the hooks as the door closes. • Watch out: Heavy glass jars make the door swing oddly — keep it to light, dry goods.
13. A slim rolling cart in the fridge gap
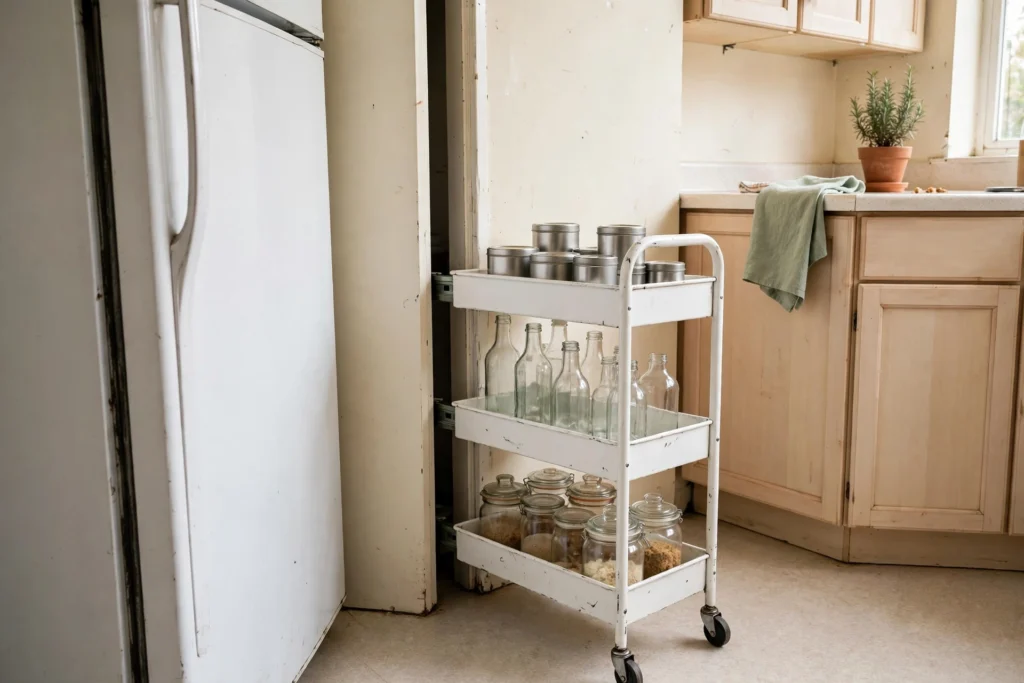
That awkward 15–20 cm gap beside the fridge fits a narrow rolling cart with three or four tiers: oils, wraps, and tins in a space that currently stores dust. Measure the gap at its narrowest point (skirting boards steal width at floor level) and the full depth, so the cart doesn’t poke out past the fridge front. Trade-off: everything on it gets dusty faster than in a cabinet — best for sealed tins and bottles, not open packets.
Cost: ~$25–45 • Best for: oils, wraps and sealed tins in the 15–20 cm gap beside the fridge. • Measure first: the gap at its narrowest point (skirting boards steal width at floor level) and the full depth. • Watch out: Everything on it gets dusty faster than in a cabinet — sealed tins and bottles, not open packets.
14. A clear over-door organiser for packets and
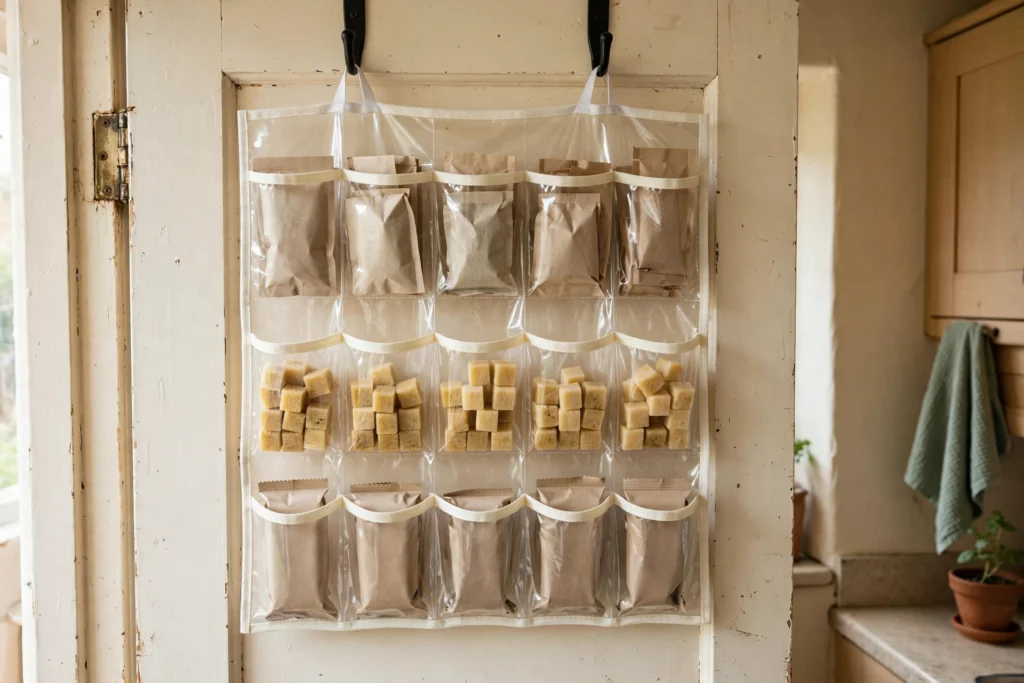
sachets
A transparent hanging organiser — the kind sold for shoes — works surprisingly well for gravy sachets, spice refills, stock cubes and snack bars, each in its own pocket where you can see it. Hang it inside a larder or utility door with its own over-door hooks. Check pocket size against your bulkiest packet before buying. Trade-off: it looks utilitarian, not pretty — inside a closed door is the right home for it.
Cost: ~$10–16 • Best for: gravy sachets, spice refills, stock cubes and snack bars, each visible in its own pocket. • Measure first: pocket size against your bulkiest packet before buying. • Watch out: It looks utilitarian, not pretty — inside a closed door is the right home for it.
15. Clip-on under-shelf baskets
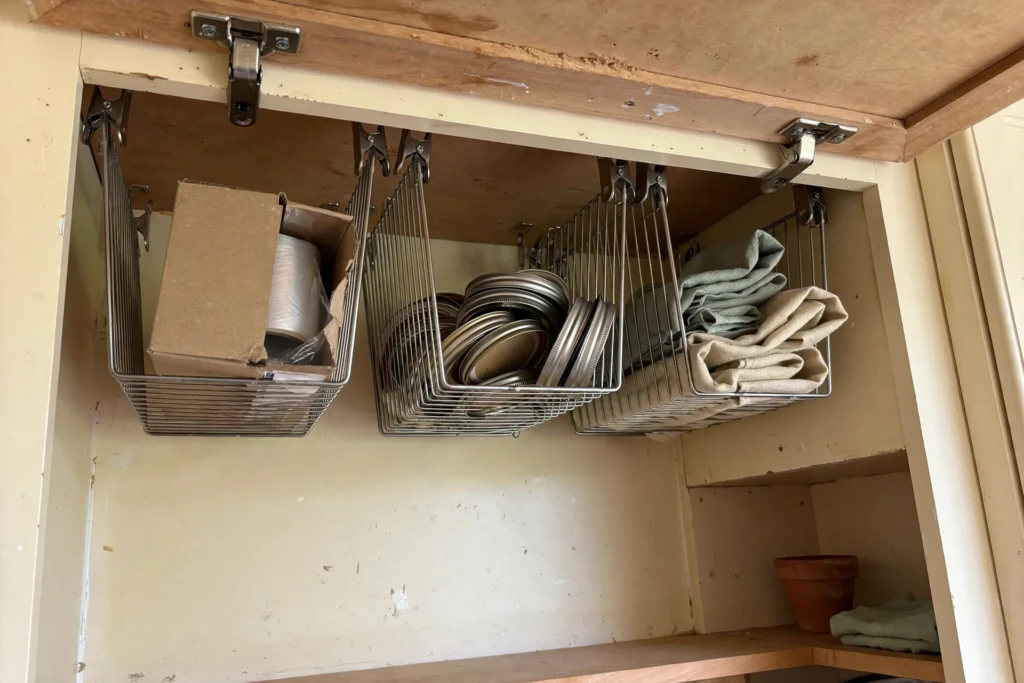
These wire baskets slide onto an existing cabinet shelf and hang beneath it, creating a bonus layer in the dead air between shelf and contents. They suit light, flat things: wraps, lids, tea towels, packet mixes. Measure the shelf thickness (most clips fit shelves up to about 2.5 cm) and the clear height below. Trade-off: they flex under weight, so one basket per shelf is plenty.
Cost: ~$12–20 • Best for: light, flat things — wraps, lids, tea towels, packet mixes. • Measure first: shelf thickness (most clips fit up to about 2.5 cm) and the clear height below the shelf. • Watch out: They flex under weight — one basket per shelf is plenty.
Drawers & food storage
16. Spring-loaded drawer dividers
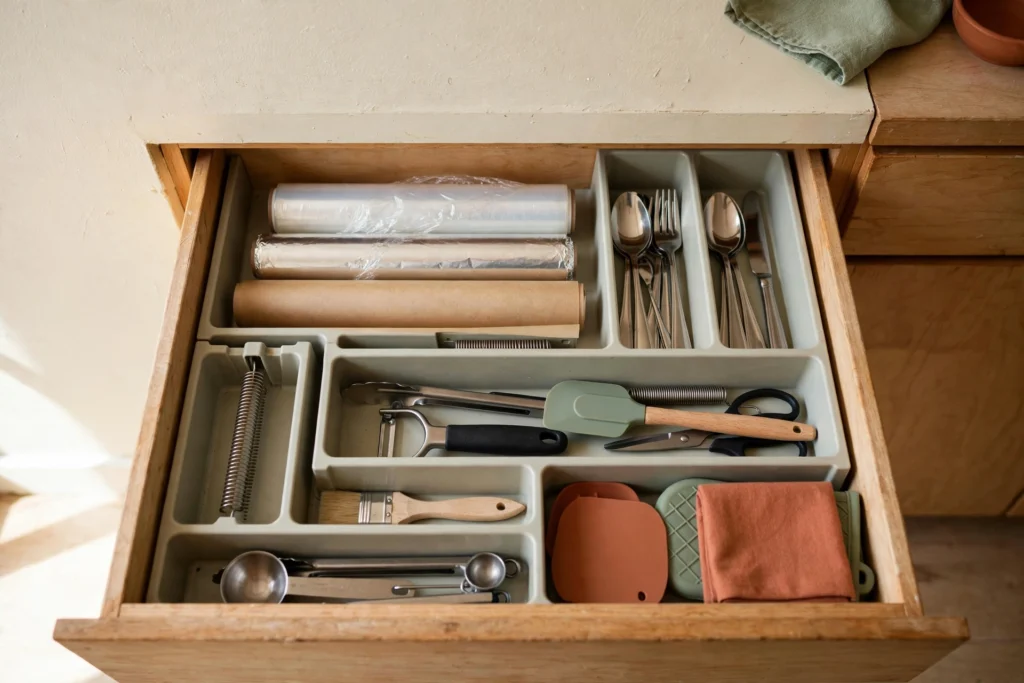
Loose dividers that tension-fit across a drawer turn one junk drawer into four calm sections — utensils, tools, wraps, miscellaneous. Measure the drawer’s inside width and depth first; dividers expand across a stated range and a wrong guess means a wobbly fit. Bamboo and plastic both work; plastic wipes cleaner near food prep. Trade-off: dividers eat a centimetre or two of drawer width each, so in a very narrow drawer, one divider beats three.
Cost: ~$12–22 • Best for: turning one junk drawer into calm sections. • Measure first: drawer inside width and depth — dividers expand across a stated range and a wrong guess means a wobbly fit. • Watch out: Dividers eat a centimetre or two of width each — in a very narrow drawer, one divider beats three.
17. An expandable in-drawer utensil and knife tray
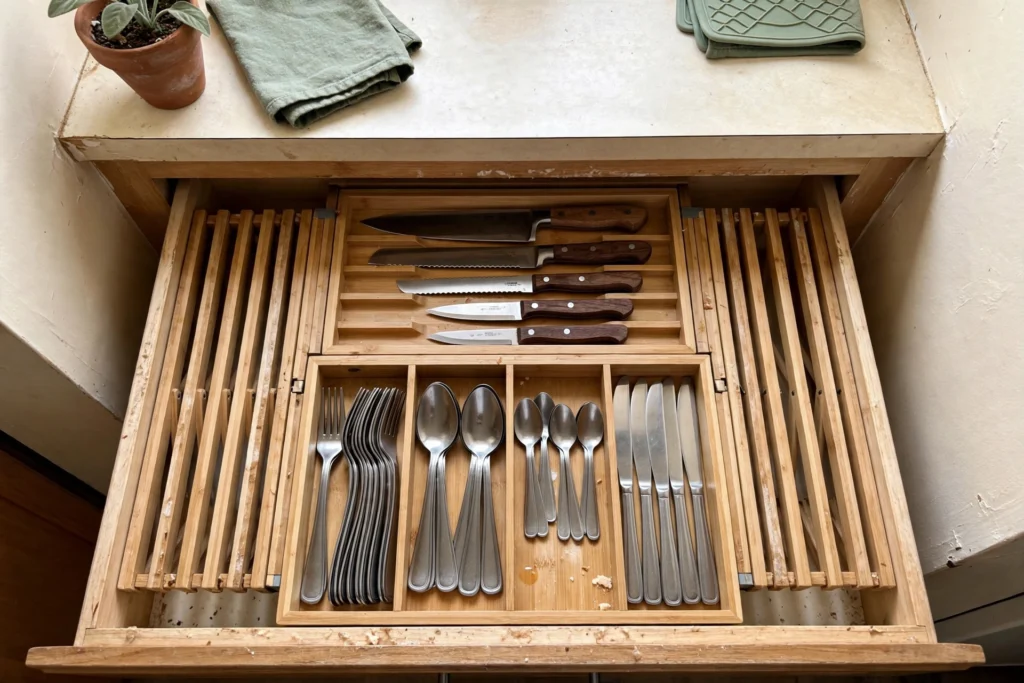
A tray that expands sideways to fit your drawer stops cutlery and knives rattling in a heap and protects both the blades and your fingers. Knife slots in a tray are safer than a magnetic strip if your drawers are deep enough. Measure the drawer’s inside height with the tray’s tallest item in mind — chunky-handled knives catch on shallow drawers. Trade-off: a fitted tray leaves odd gaps at the edges; use them for long, thin items like skewers and chopsticks.
Cost: ~$15–30 • Best for: cutlery and knives that rattle in a heap; safer than a strip if drawers are deep enough. • Measure first: drawer inside height with the tray’s tallest (chunky-handled) item in mind. • Watch out: A fitted tray leaves odd gaps at the edges — use them for skewers and chopsticks.
18. Decant dry goods into stackable square containers
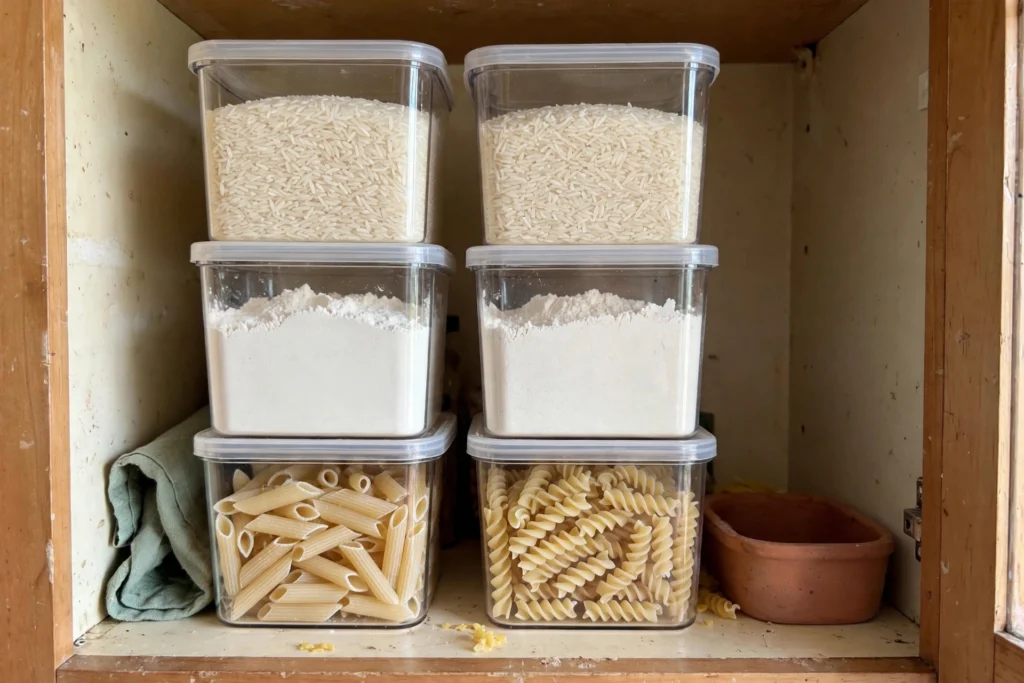
Bags of rice, flour and pasta slump, spill and waste the corners of every shelf. Square or rectangular containers stack flush and use the full footprint — round jars in a small kitchen are a luxury. Match container heights to your shelf spacing and keep one shelf’s worth, not a matching set of twelve. Honest note: decanting costs a little money upfront and a minute per bag, and it’s worth it only for things you buy repeatedly.
Cost: ~$20–40 • Best for: rice, flour and pasta you buy repeatedly — square stacks flush, round wastes corners. • Measure first: your shelf spacing, and match container heights to it; keep one shelf’s worth, not a set of twelve. • Watch out: Only worth it for things you buy repeatedly — decanting costs money upfront and a minute per bag.
19. Clear stacking fridge bins with handles
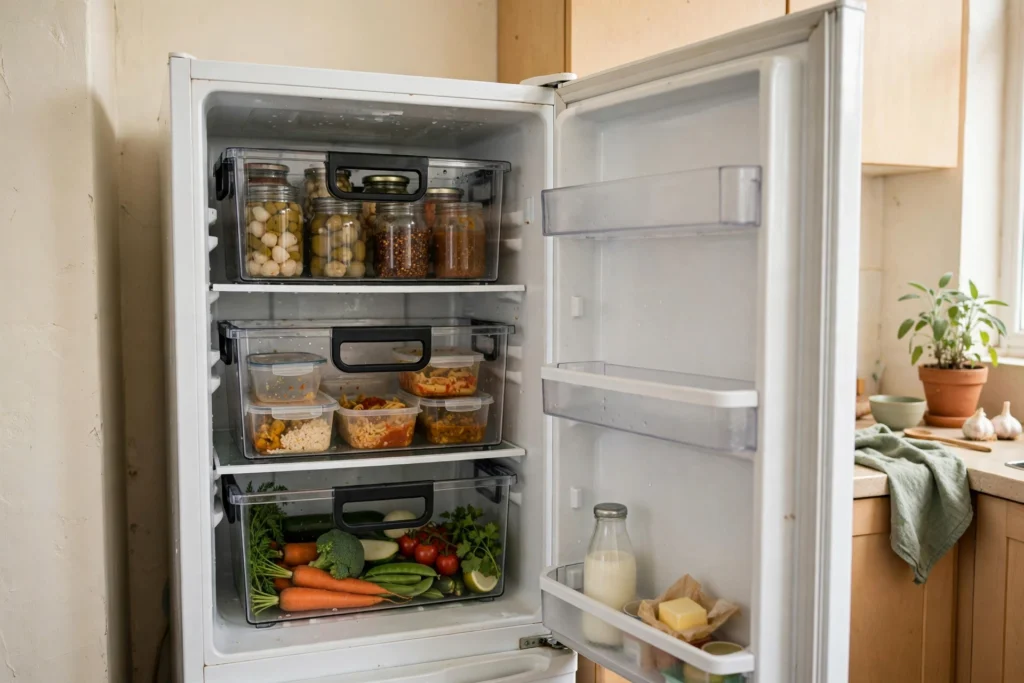
Two or three clear bins turn a shallow rental fridge into zones: jars and sauces, leftovers, the week’s vegetables. Handles matter — you pull the whole zone out instead of excavating. Measure the fridge shelf depth and door clearance first; bins a centimetre too deep stop the door sealing. Trade-off: bins slightly reduce total capacity, so in a truly tiny fridge, one bin for jars alone is the sweet spot.
Cost: ~$15–25 • Best for: zoning a shallow fridge — jars and sauces, leftovers, vegetables. • Measure first: fridge shelf depth and door clearance — bins a centimetre too deep stop the door sealing. • Watch out: Bins slightly reduce total capacity — in a truly tiny fridge, one bin for jars alone is the sweet spot.
Vertical & above
20. A freestanding over-sink shelf
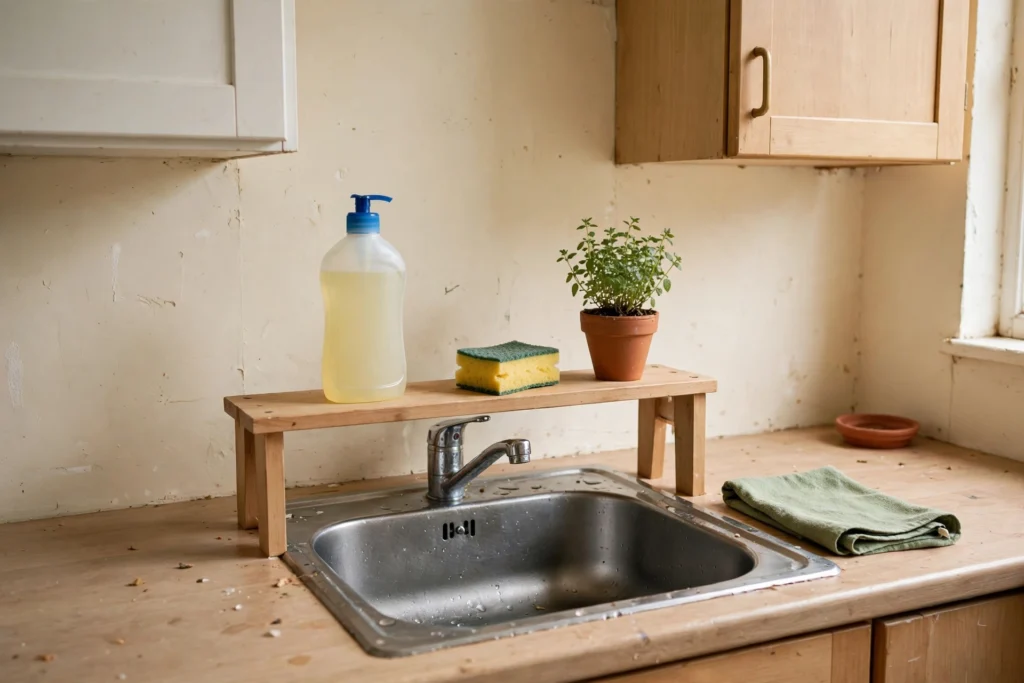
A bridge-style shelf that stands over the sink and faucet holds washing-up liquid, sponges and a small plant at eye level, off the counter entirely. Measure three things: the span across your sink, the height of your tap at its tallest, and the window or wall space behind it. Trade-off: in kitchens where the window opens inward over the sink, a shelf can block it — check before you fall in love with the idea.
Cost: ~$30–50 • Best for: washing-up liquid, sponges and a small plant at eye level, off the counter. • Measure first: three things — span across the sink, tap height at its tallest, and the window or wall space behind it. • Watch out: An inward-opening window over the sink can block it — check before you fall in love with the idea.
21. Baskets in the gap above the wall cabinets
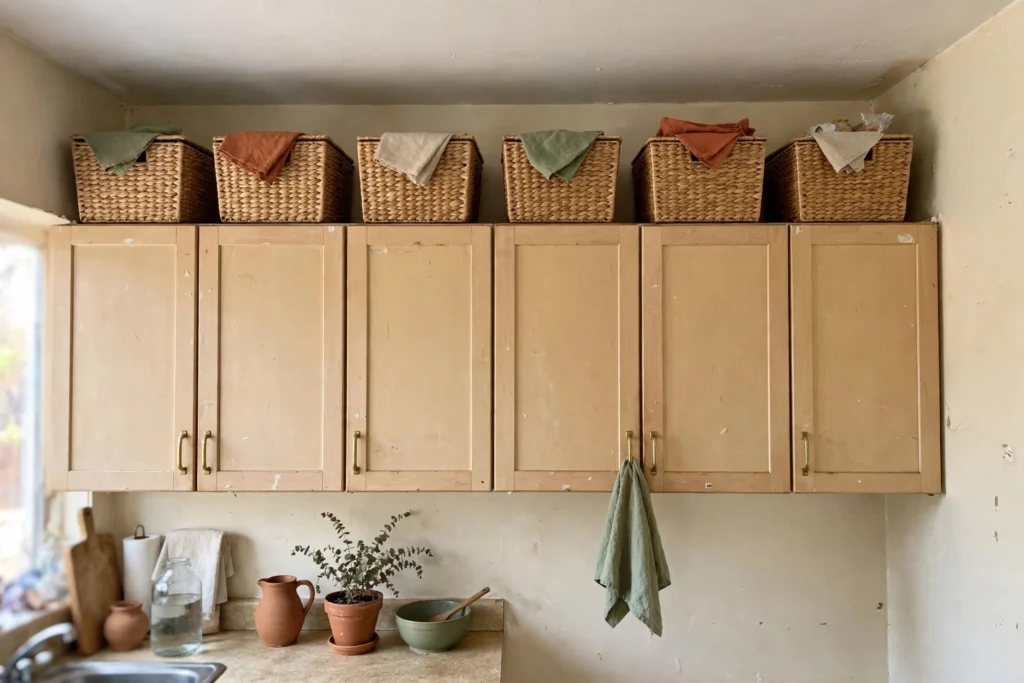
Many rental kitchens have a 25–40 cm gap between the wall cabinets and the ceiling. Matching baskets up there store the things you use twice a year: the big serving bowl, seasonal items, spare lightbulbs. Measure the gap height and buy baskets at least 3 cm shorter, so they slide in without scraping. Use identical baskets — mixed shapes up high look like clutter, identical ones look intentional. Trade-off: you need a step stool to reach them, so nothing daily goes up there. Ever.
Cost: ~$15–30 • Best for: things you use twice a year — big serving bowl, seasonal items, spare lightbulbs. • Measure first: gap height (often 25–40 cm) and buy baskets at least 3 cm shorter so they slide in without scraping. • Watch out: You need a step stool to reach them — nothing daily goes up there. Ever.
22. A narrow freestanding shelf unit in the dead corner
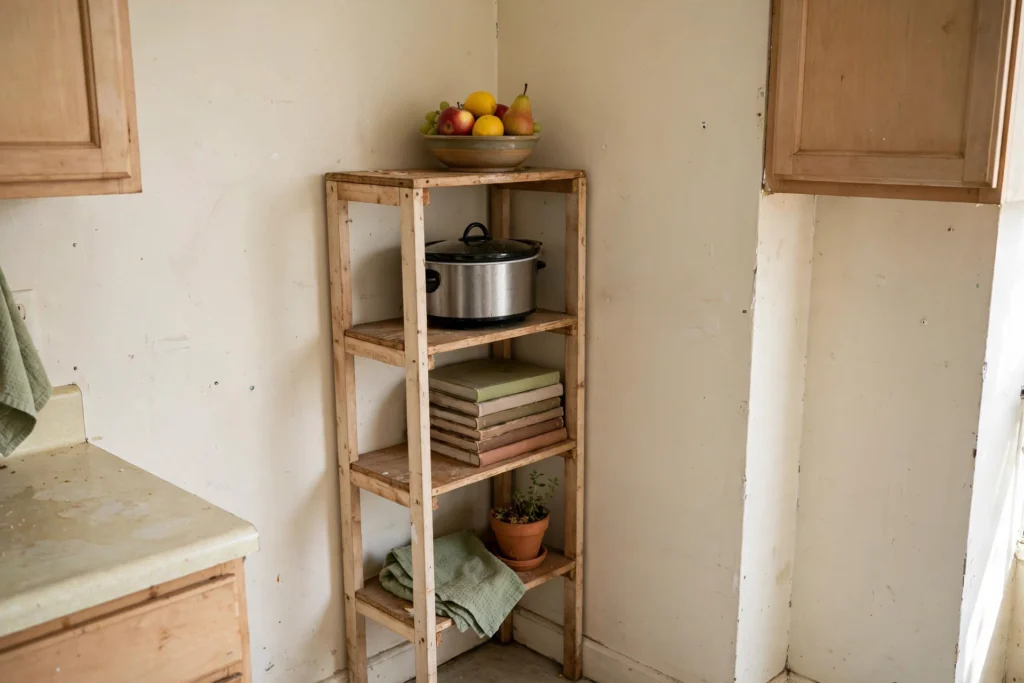
Most small kitchens have one corner too awkward for a cabinet’s swing. A narrow freestanding unit — 25–30 cm deep — fits there and holds cookbooks, a slow cooker or the fruit bowl. Check it stands clear of the oven door’s swing and any radiator. Because it’s freestanding furniture, not a fitting, it moves with you. Trade-off: open shelves collect grease near a hob, so this corner works best at the far end of the kitchen.
Cost: ~$35–70 • Best for: cookbooks, a slow cooker or the fruit bowl in a corner too awkward for a cabinet swing. • Measure first: corner depth (units here are 25–30 cm deep) and clearance from the oven door’s swing and any radiator. • Watch out: Open shelves collect grease near a hob — this corner works best at the far end of the kitchen.
23. A magnetic knife strip on the fridge side
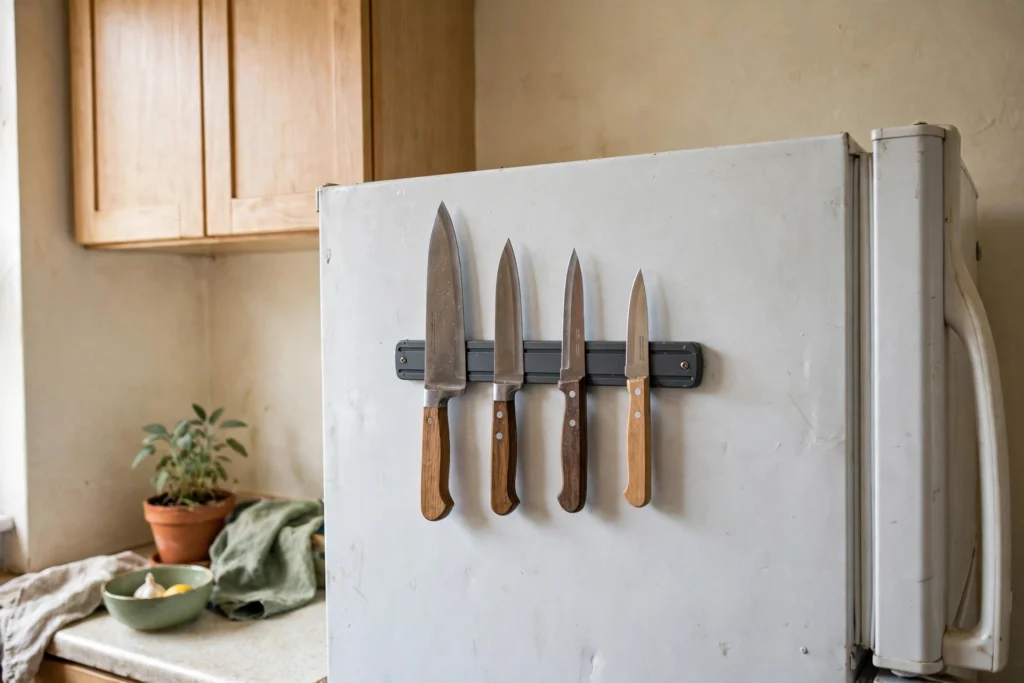
If your drawers are too shallow for a knife tray, a strong magnetic strip on the fridge side keeps knives visible, dry and out of drawers. Magnetic-on-appliance only: nothing is screwed into anything. Leave a hand’s width of clearance so blades don’t catch sleeves as you pass. Trade-off: not suitable if small children can reach the fridge side at their height.
Cost: ~$15–25 • Best for: knives when drawers are too shallow for a tray — magnetic-on-appliance only. • Measure first: leave a hand’s width of clearance so blades don’t catch sleeves. • Watch out: Not suitable if small children can reach the fridge side at their height.
Common mistakes we’d skip
- Buying a full organiser set before measuring. Sets assume standard cabinets; rental cabinets are never standard. Buy one piece, live with it a week, then expand.
- Adhesive products with permanent pads. If it doesn’t say ‘removable’ on the pack, it doesn’t go on a rental wall. Removable strips only — and keep the pull-tabs reachable.
- Storing daily items up high. If you need it every day, it lives between knee and shoulder height. High and low storage is for the rarely used, or you’ll stop putting things away.
- Filling every gap you find. A kitchen where every centimetre is stuffed is slower to cook in. Leave one shelf or drawer deliberately half-empty for the week’s shopping surge.
The short version
Small rental kitchens don’t need more space — they need the space they have working in layers: risers inside cabinets, a bridged shelf over the pipes, doors and fridge sides doing quiet work, and everything measured before it’s bought. Start under the sink; it’s the cabinet with the most wasted room in almost every rental.
And before your next shop, grab the free Pre-Shopping Checklist and the rest of the printable library in Printables & Checklists — measure once, buy once, and keep the deposit exactly where it belongs: coming back to you.
Write the numbers in your phone notes, not on a scrap of paper you’ll lose. We turned this into a free printable: the Pre-Shopping Checklist in our Printables & Checklists library walks you through each measurement with a simple diagram, so you measure once and shop with the numbers in hand.
Questions renters ask
Will removable strips really hold a utensil rail?
Yes — if the strips are rated above the load and applied to smooth tile or paint (never wallpaper). Keep the pull-tabs accessible so they remove cleanly on moving day.
What if my cabinet is a different size to standard?
That’s the norm in rentals — there is no standard. Measure the door opening, the depth, and both sides of the pipes, then buy one piece, live with it for a week, and only then expand.
Can I use a magnetic knife strip without drilling?
Only the magnetic-on-appliance kind — on the fridge side, as in idea 23. Don’t drill or glue one to a wall, and keep it out of reach of small children.
What’s the one thing to buy first?
A two-tier under-sink basket (or a shelf riser) — the under-sink cabinet wastes the most space, and a riser doubles a shelf instantly.
Found this useful?
Save it to Pinterest for shopping day, or tell us your smallest-space problem in the comments — the best posts here started as a reader’s awkward cabinet.
📌 PIN THIS FOR LATER